
- AppliancesElectriciansHVACLandscapingLocksmithPest ControlPlumbingRenovationRoofingT V RepairAll Home Improvement
- Car AccidentClass ActionCorporate LawCriminal DefenseDivorce LawEmployment LawFamily LawFinancial LawLegal AidMedical Injury LawyersMedical MalpracticeReal Estate LawWater Fire RestorationAll Legal
- InvestmentRetirementAll Finance
- Animal InsuranceAutoGeneral InsuranceHealth PolicyHome RentersAll Insurance
- DentalHealth SpecialistsAll Medical
- Animal CareVeterinaryAll Pets
- Auto GlassTowingAll Automotive
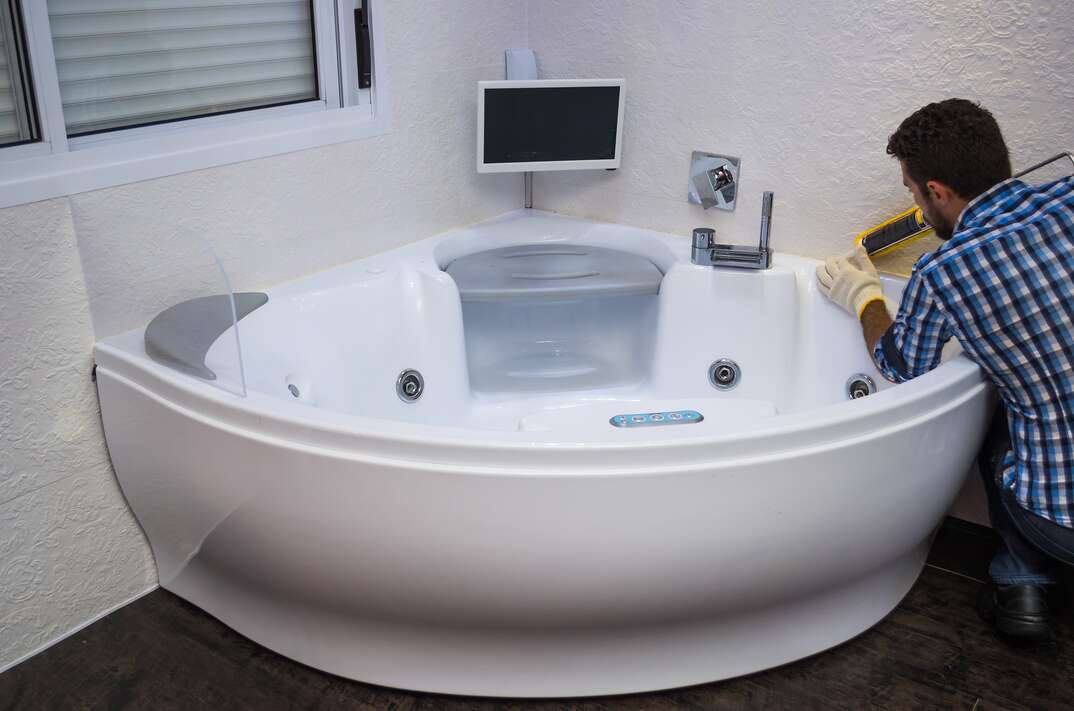
How to Re-Caulk Your Shower or Bathtub
Have you noticed drips, cracks and stains along the edges of your shower or bathtub? If so, your caulking may have seen better days.
Read More Home Improvement Articles
Thankfully, re-caulking your shower or bathtub is a relatively easy and inexpensive task. Here’s how you can restore the look of your caulking and help improve the aesthetic of your bathroom.
Telltale signs that it's time to give your tub or shower a caulking makeover include:
- Visible wear and tear: Among the most obvious signs are cracks, gaps or peeling caulk.
- Mold and mildew: If you notice mold or mildew along the caulk lines, it's a clear indication moisture is penetrating the seal.
- Leakage: Water leakage around the tub or shower edges, even if it’s minor, suggests the caulk isn’t effectively sealing the area.
- Discoloration: Discolored or yellowing caulk is a sign of aging and degradation that, if untreated, will eventually result in leakage.
- Softened caulk: If the caulk feels soft or spongy to the touch, it has likely lost its effectiveness and should be replaced.
Things You’ll Need
As with any DIY job, you should gather all necessary materials and tools before you start. Here’s what you will need:
- Caulk: Choose a high-quality silicone or silicone-based bathroom caulk specifically designed for wet environments.
- Caulk gun: Use this to dispense the caulk evenly along the seams.
- Utility knife or caulk removal tool: Use this to remove the old caulk.
- Caulk remover solution: This optional solution is useful for removing stubborn caulk residue.
- Rubbing alcohol or bleach: Use this to clean the surface before re-caulking.
- Painter’s tape: Create clean lines and prevent excess caulk from spreading.
- Rags or paper towels: Use these for cleaning and wiping away excess caulk.


When you’ve got your materials, you’re ready to begin the job of re-caulking your shower or bathtub. Follow these steps:
Step 1: Remove Old Caulk
Using your utility knife or caulk removal tool, carefully scrape away the old caulk. Be thorough in removing any residue, ensuring a clean surface for the new caulk.
Step 2: Clean the Area
Wipe down the seams with rubbing alcohol or a bleach solution to remove any remaining debris, mold or mildew. Don’t start the next step until the area is completely dry.
Step 3: Apply the Painter’s Tape (Optional)
Line the areas on either side of where you need the caulk to be with the painter’s tape. Straight lines ensure caulk doesn’t go where you don’t need it.
Step 4: Prepare the Caulk
Slip the caulk tube into the caulk gun and cut the tip of the nozzle at an angle of 45 degrees. This creates an opening that matches the width of the seam.
Step 5: Apply Caulk
Holding the caulk gun at a consistent angle, apply a steady bead of caulk along the seam. Use smooth, continuous motions to ensure even coverage.
Step 6: Smooth the Caulk
Wet your finger or use a caulk finishing tool to smooth out the caulk line. This ensures it adheres well to the surface and creates a watertight seal.
Step 7: Remove Excess Caulk
Immediately after applying the caulk, remove any excess with a damp rag or paper towel. If you used painter’s tape, you might not need this step.
Step 8: Let It Dry
Allow the caulk to dry. For best results, follow the manufacturer’s instructions.
More Related Articles:
- How Much Does a Home Inspection Cost?
- 4 Tips for Hiring a General Contractor for Your Next Remodeling Project
- Should You Hire a Contractor or a Handyman?
- 5 Things to Look For When You're Hiring an Electrician
- What to Look for When Hiring an Exterminator
How Long Does It Take for New Caulk to Dry?
Typically, a new caulking job around a tub or shower takes approximately 24 hours to dry fully and achieve maximum strength. Resist the urge to test it out too soon and give it the time it needs to set properly. Your beautifully re-caulked shower or bathtub will be more effective as a consequence.
Re-caulking your shower or bathtub is a simple yet effective way to prevent water damage and maintain the appearance and functionality of your bathroom. By following these steps and using the right materials, you can ensure a professional-looking seal that stands the test of time.
Elocal Editorial Content is for educational and entertainment purposes only. Editorial Content should not be used as a substitute for advice from a licensed professional in your state reviewing your issue. Systems, equipment, issues and circumstances vary. Follow the manufacturer's safety precautions. The opinions, beliefs and viewpoints expressed by the eLocal Editorial Team and other third-party content providers do not necessarily reflect the opinions, beliefs and viewpoints of eLocal or its affiliate companies. Use of the Blog is subject to the
Website Terms and Conditions.The eLocal Editorial Team operates independently of eLocal USA's marketing and sales decisions.